Certificates and Devices
To show HTTPS traffic, Chapar has to decrypt it. It does that with its own certificate authority (CA), made on your computer the first time you start the proxy: for each site an app visits, Chapar signs a certificate with that CA. Apps only accept those certificates once they trust the CA, so that’s the one setup step HTTPS needs.
The CA is yours alone. It’s created on your computer, its private key never leaves it, and no two Chapar installations share one.
The Setup guide
Click Setup on the Proxy page. The guide checks each step and says what to do about any that isn’t ready. Check again runs the checks once more.
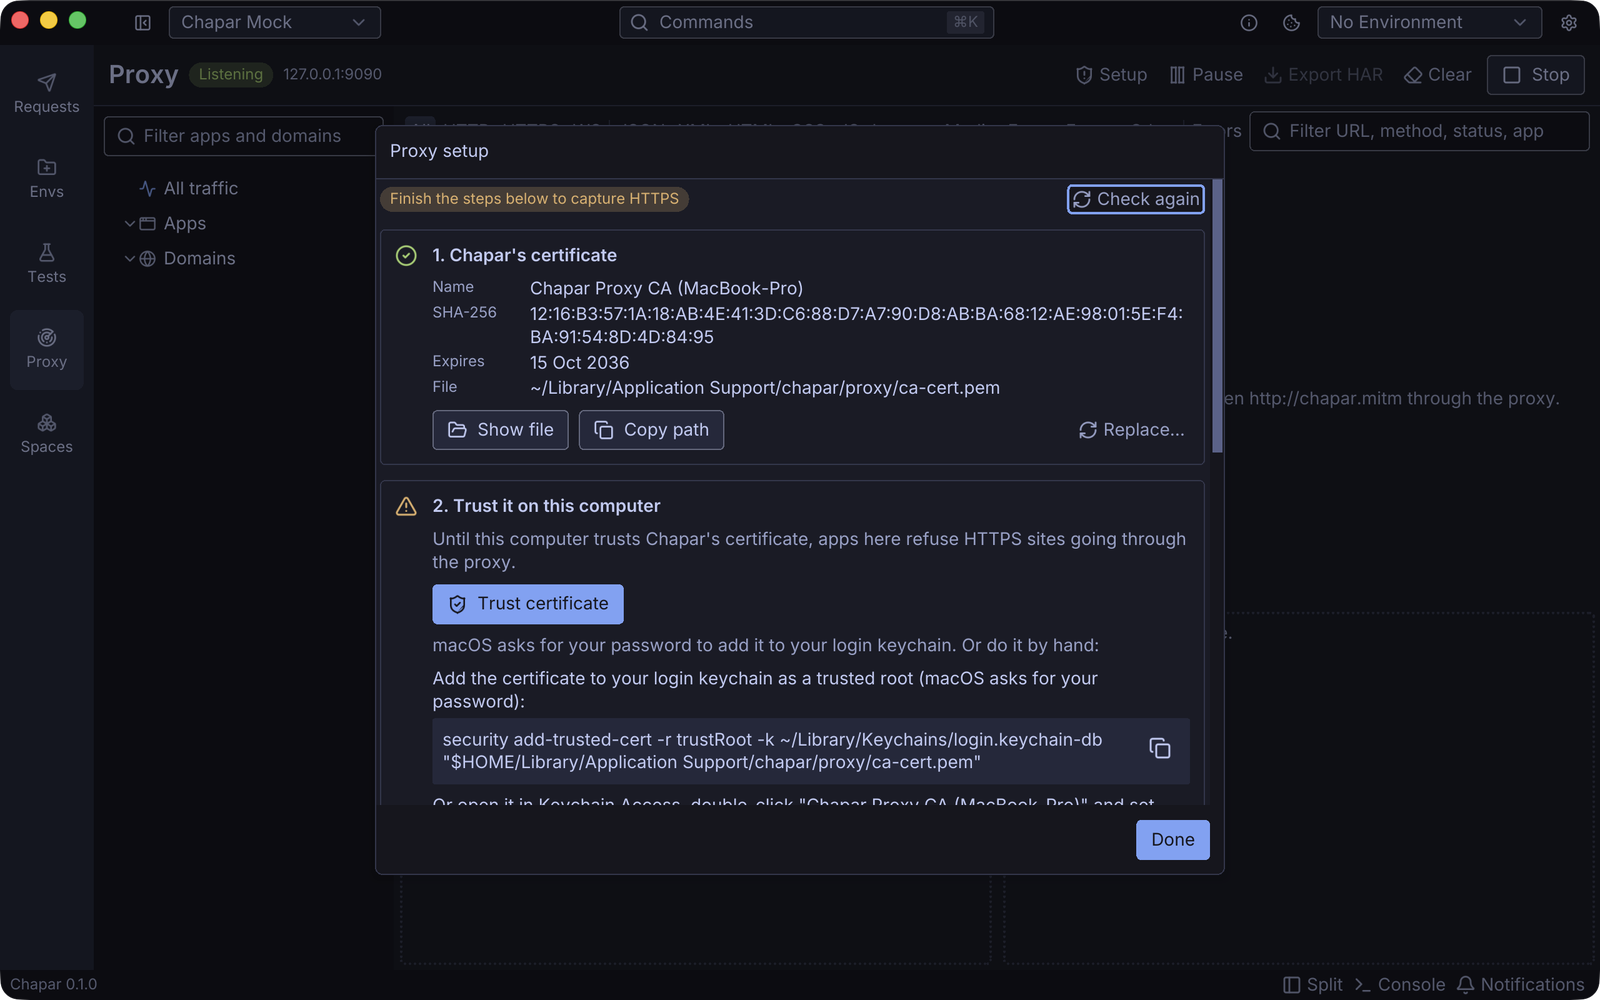
- Chapar’s certificate: its name, SHA-256 fingerprint, expiry date and file. Show file opens its folder, and Copy path copies the file’s path. Replace… makes a new CA; every device that trusted the old one has to trust the new one.
- Trust it on this computer: see below.
- Start the proxy: shows the address it listens on.
- Send traffic through Chapar: shows whether your system’s proxy setting points to Chapar, how to set it, and the snippet for terminal tools.
- Phones and other devices: see below.
The guide is ready when the certificate exists, this computer trusts it, and the proxy is running.
Trust it on this computer
macOS
Click Trust certificate. macOS asks for your password, then adds the certificate to your login keychain as trusted. Remove trust takes it out again.
To do it by hand, run the command the guide shows:
security add-trusted-cert -r trustRoot -k ~/Library/Keychains/login.keychain-db "$HOME/Library/Application Support/chapar/proxy/ca-cert.pem"or open the file in Keychain Access, double-click Chapar Proxy CA and set When using this certificate to Always Trust.
Windows
Run the command the guide shows. Windows asks you to confirm:
certutil -user -addstore Root "<path shown in the guide>"Linux
Run the command for your distribution:
# Debian, Ubuntu
sudo cp "$HOME/.config/chapar/proxy/ca-cert.pem" /usr/local/share/ca-certificates/chapar-ca.crt && sudo update-ca-certificates
# Fedora, RHEL, Arch
sudo trust anchor --store "$HOME/.config/chapar/proxy/ca-cert.pem"
Firefox
Firefox keeps its own list of trusted certificates. Open Settings › Privacy & Security › Certificates › View Certificates › Authorities › Import, choose the certificate file, and tick Trust this CA to identify websites.
Phones and other devices
- In Settings › Proxy, turn on Allow devices on local network and restart the proxy. The Proxy page then shows this computer’s network address, such as
192.168.1.20:9090. - On the device, open the Wi-Fi network’s settings, set its HTTP proxy to Manual, and enter that address and port.
- On the device, open http://chapar.mitm in the browser. That page is served by Chapar: it shows the certificate’s fingerprint, offers it for download, and opens the install steps for the device it’s viewed on.
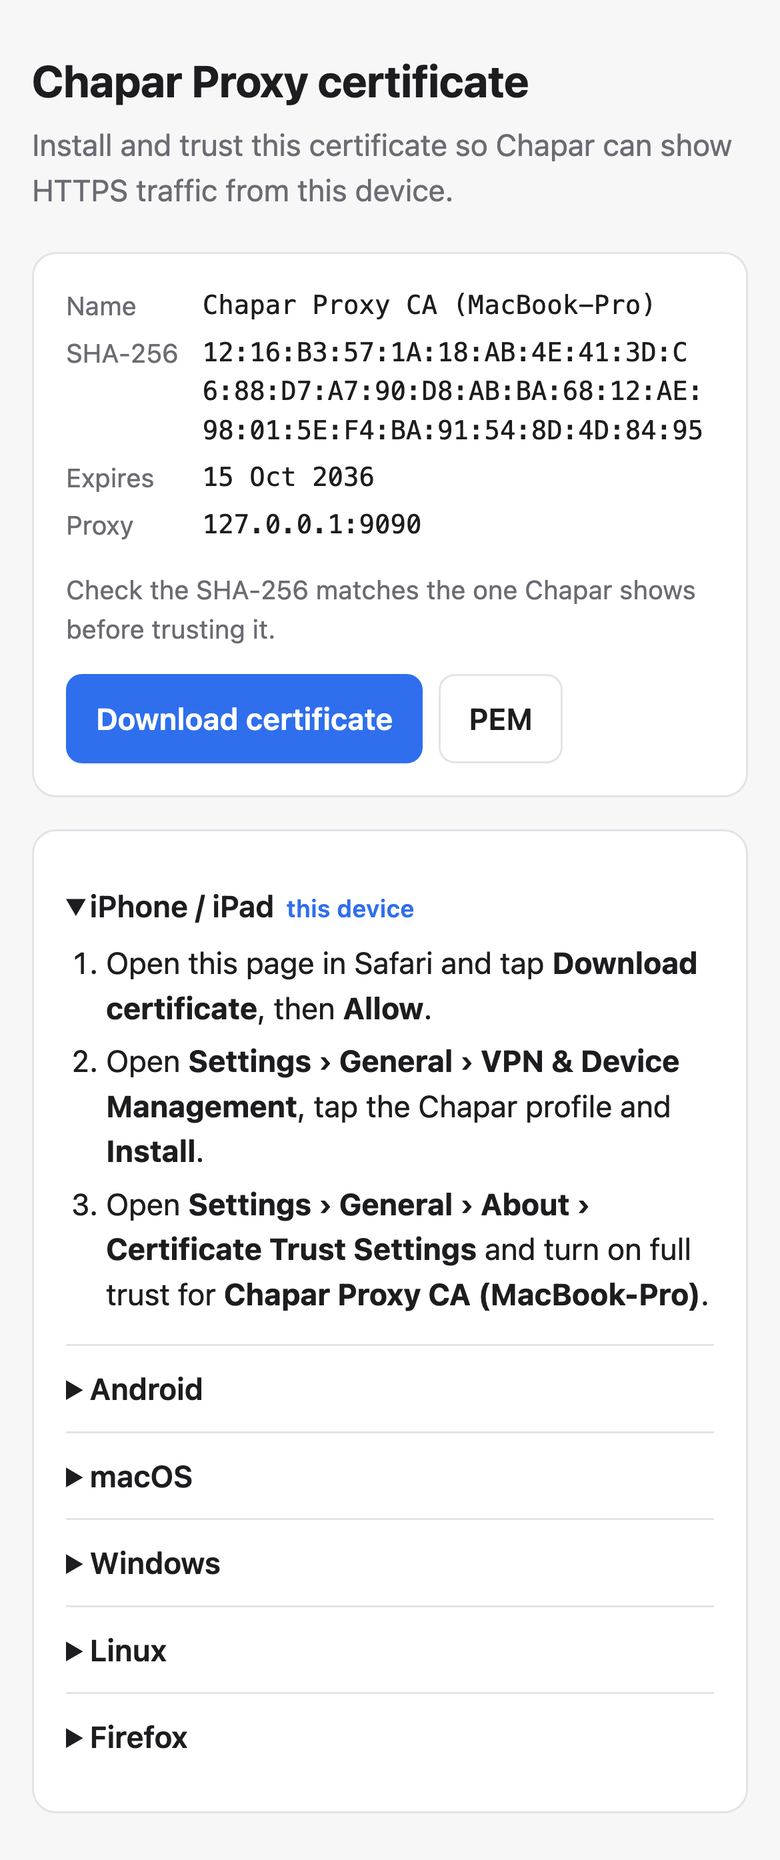
Check that the SHA-256 on the page matches the one in Chapar’s Setup guide before you trust the certificate.
iPhone and iPad
- Open http://chapar.mitm in Safari, tap Download certificate, then Allow.
- Open Settings › General › VPN & Device Management, tap the Chapar profile and Install.
- Open Settings › General › About › Certificate Trust Settings and turn on full trust for Chapar Proxy CA.
Android
- Open http://chapar.mitm and tap Download certificate.
- Open Settings › Security › More security settings › Encryption & credentials › Install a certificate › CA certificate and choose the file.
Apps built for Android 7 or later ignore certificates you install unless they opt in, so most apps’ HTTPS traffic stays hidden. Browsers such as Chrome do accept them.
Removing it
- macOS: Remove trust in the Setup guide.
- Other systems and devices: remove Chapar Proxy CA from the trusted certificates where you added it.
- Replace… in the Setup guide makes a new CA, so any device still trusting the old one can no longer be decrypted.
The CA files live in Chapar’s settings folder, under proxy/.